
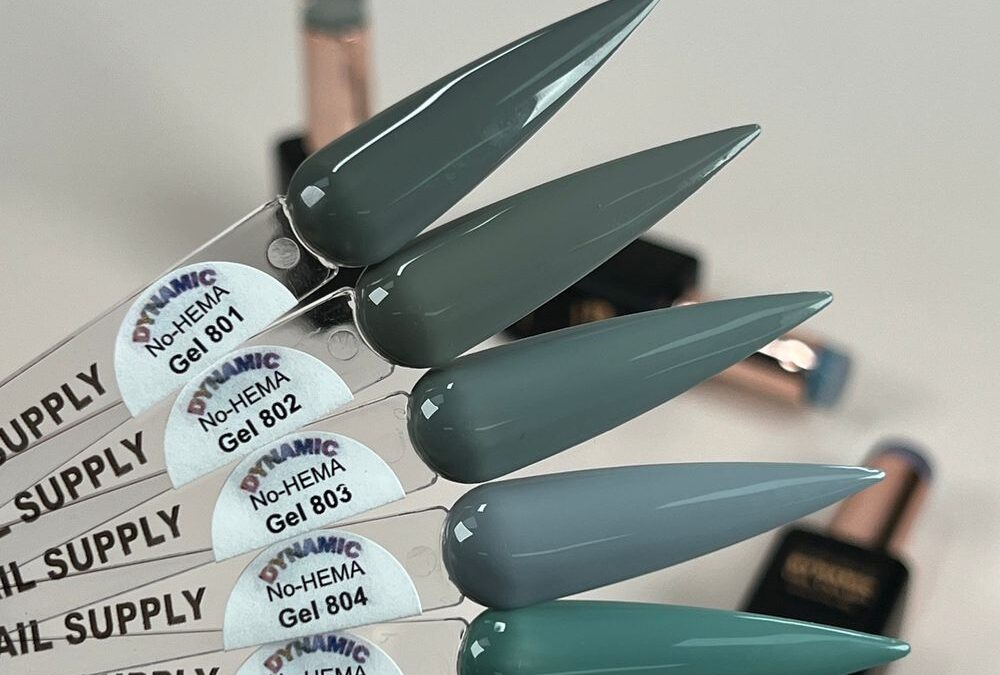
In this FAQ you’ll learn the tools, layering steps, and finishing moves to create a crisp charcoal matte to gloss ombré that reads modern and minimal. We keep the look cool-toned and calm, using deep charcoal and pale grey-blue gloss cremes from a ten-shade cool palette.
1. What is a charcoal matte to gloss ombré and why pick it?
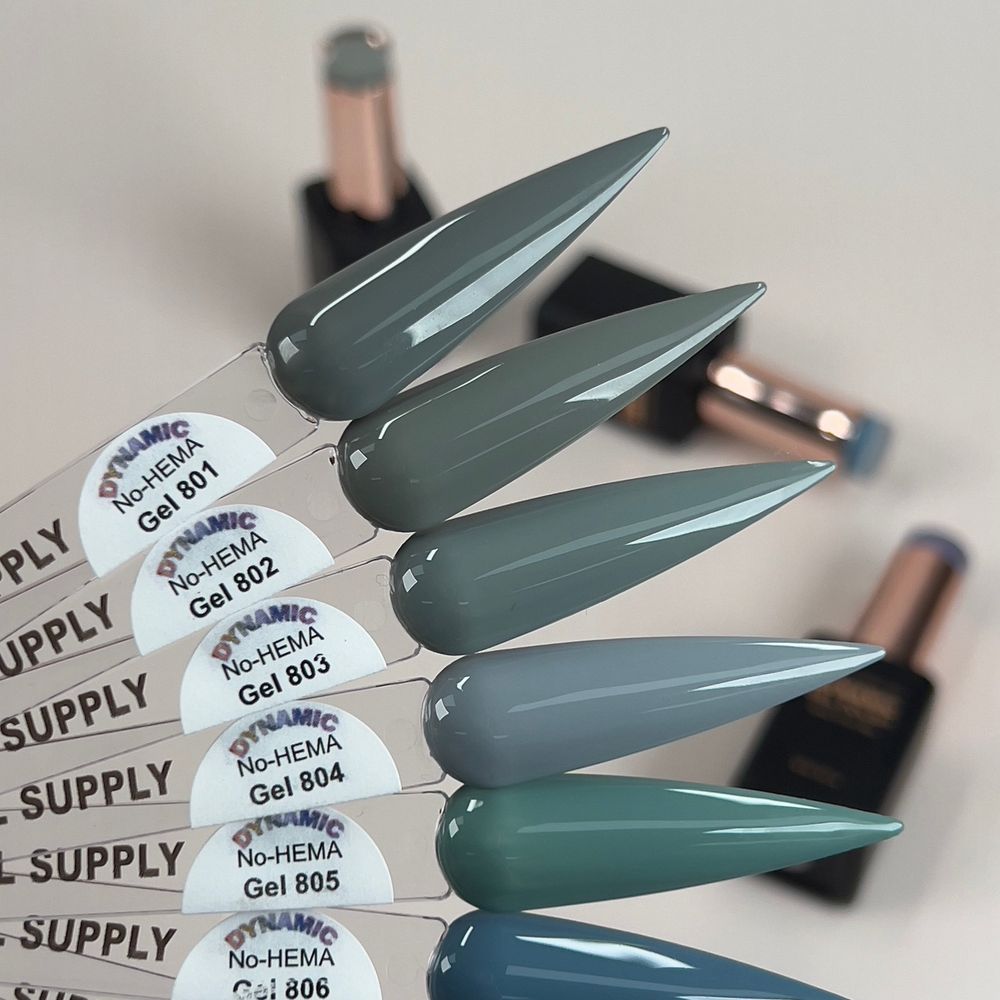
A charcoal matte to gloss ombré blends a deep charcoal grey into a pale grey-blue with a matte base that shifts to a glossy tip or accent. You get moody sophistication without busy details—great for clients who want quiet modern nails that still pop in photos.
2. Which shades from this cool, muted set do you need?
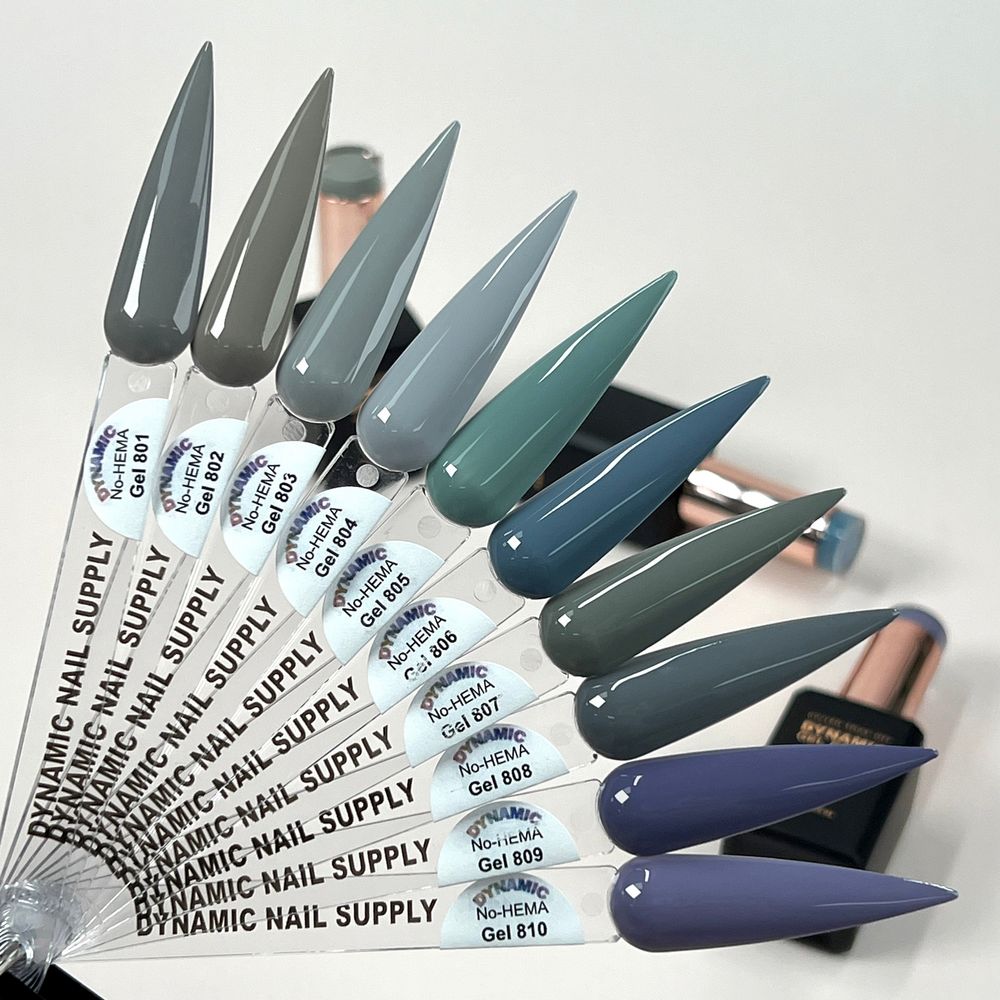
Pick a deep charcoal-grey shade for the dark end and a pale grey-blue for the light end. The set’s progression from charcoal through slate blues to teal and dusky blue-violet makes it easy to add tonal midpoints if you want a softer gradient.
3. What tools and quick specs should be at your station?
- Gel bottles: 15 ml each (the set contains ten cool cremes).
- UV/LED lamp: 60–120 seconds cure time per layer.
- Flat gradient brush or small eyeshadow sponge for soft blends.
- Matte topcoat and gloss topcoat, thin application brush, lint-free wipes.
4. How do you prep the nail for a clean matte-to-gloss transition?
File and shape as usual, lightly buff the surface, and remove dust. Apply a thin base layer and cure. Use thin layers of color to avoid pooling—especially when you will mix matte and gloss finishes on the same nail.
5. What is the step-by-step technique for the ombré blend?
- Block in the matte base color on the lower two-thirds of the nail and cure.
- Place the pale grey-blue gloss creme at the tip area—don’t cure yet.
- Use a clean gradient brush or a tiny sponge to pull the pale color down into the matte zone with gentle, short strokes until the transition is smooth.
- Remove excess at the cuticle and cure the whole layer for 60–120 seconds.
- Apply a second thin layer if needed for opacity, then cure.
If you want a reliable charcoal anchor for the shadow end of this ombré, try No-HEMA Gel Creme in the deep grey bottle.
6. How do you keep the gloss crisp against matte areas?
Mask the matte area with a dry strip of micro-tape or use a thin brush to lightly apply matte topcoat only where you want flat finish. Cure matte sections before adding the glossy tip, then finish with a gloss topcoat solely on the tip or gloss stripe. This contrast keeps edges sharp and reflective without bleed.
7. Spotlight: No-HEMA Gel 801 — where to use it in this look?
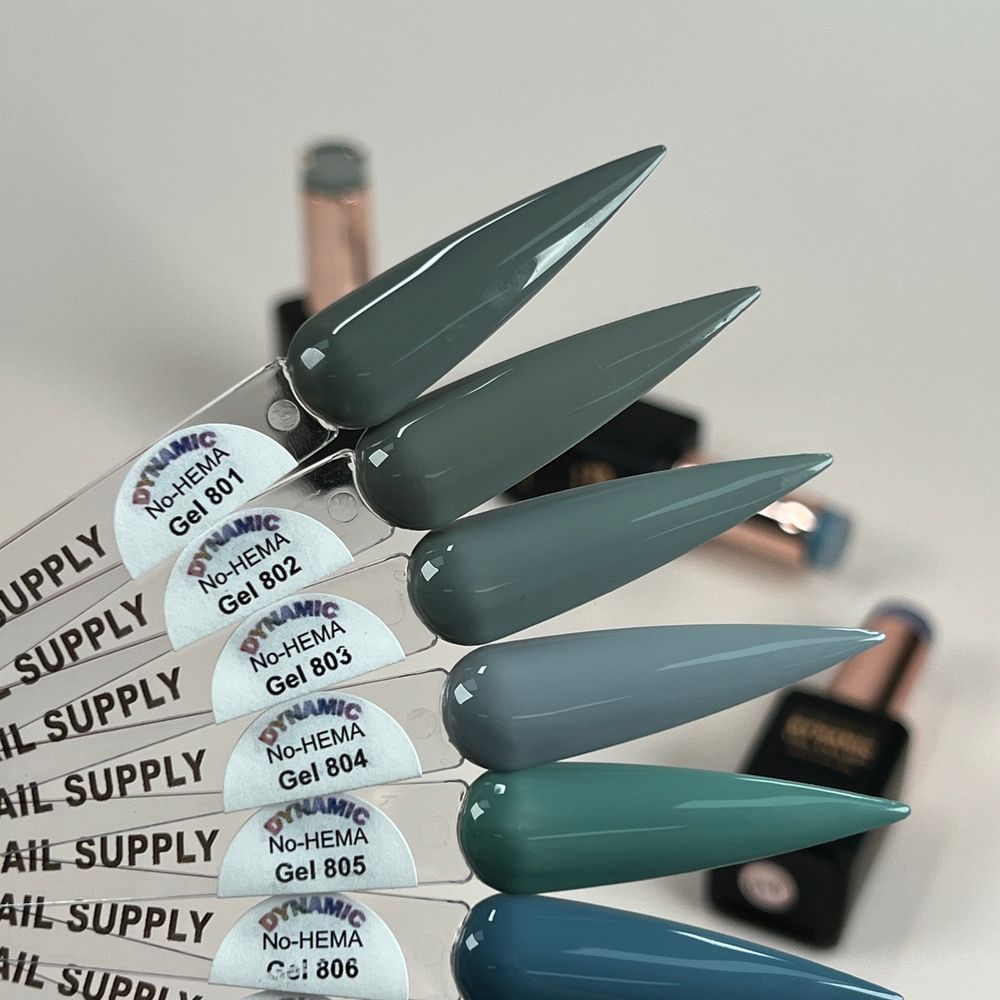
No-HEMA Gel 801 reads as the deep charcoal anchor in the photo palette. Use it as your shadow base on ring and index nails or all-over on an accent nail. Its dense pigmented, high-gloss creme finish curates the moody start of the ombré before you swap to matte treatment.
For a consistent salon cart, consider purchasing single bottles or the whole set; 10-color sets are available and prices may change.
When you arrange a palette for tonal work like this, adding one or two mid-tones from the same cool family helps with smoother blending.
8. What finishing tips and wear care keep the look salon-ready?
Wipe tacky inhibition layer only when instructed by your topcoat type. Seal free edges with thin final layers and cure fully. Recommend gentle file-down touch-ups rather than peeling to extend wear. HEMA-free formulas reduce exposure concerns for you and clients, but always wear gloves if you’re doing many sets per day.
9. Troubleshooting: Why might the blend look muddy and how fix it?
- Too-thick layers cause dragging—keep coats thin.
- Insufficient curing between layers can create smudging—follow lamp times.
- Use a clean brush or sponge for each nail to avoid cross-contamination of pigments.
10. How does safety and handling change with a No‑HEMA gel?
No-HEMA formulations lower the likelihood of HEMA-related sensitivities, but safe handling still matters: work in a ventilated space, avoid skin contact, and store bottles closed. For busy techs, simple gloves and regular station cleaning help keep exposures minimal.
Mini Glossary
- Creme: Smooth, non-shimmer gel finish.
- Inhibition Layer: Tacky film left after curing some gels.
- Free Edge Seal: Thin topcoat along the nail tip to prevent chips.
Pro tip: For a sharp, modern result, cure matte areas before adding glossy tips; the two finishes play best when layered, not rushed.